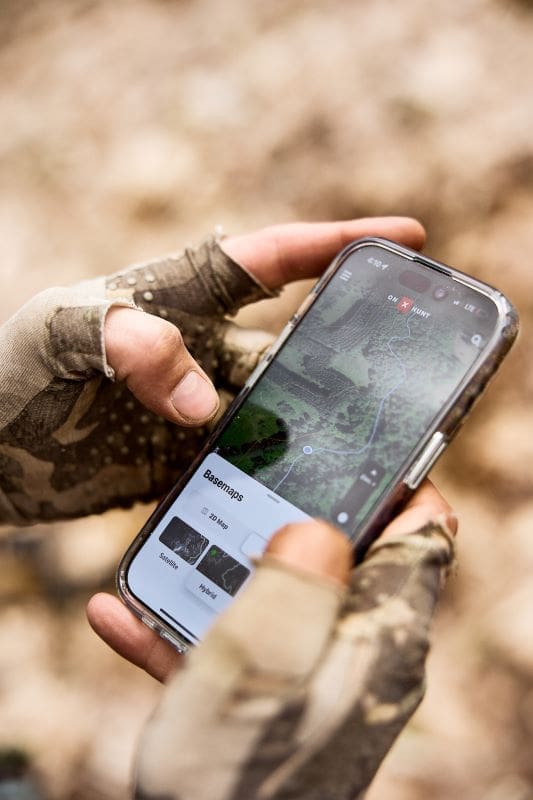
There are few things better this time of year than having a buck show up on your trail camera. Trail cams are awesome – you get to monitor a little section of the woods all the time. It’s fun to see what’s going on when you’re not around, and extremely useful when you’re trying to pinpoint a buck’s location.
Trail camera technology has been around for a while and are invaluable scouting tool. But if you’ve never used one before, where do you start? There are tons of options on the market, and it can be hard to choose. Should you have more than one? Where do you put them? Here’s a quick guide to help you get started:
Know the Products
Every brand has its flagship camera and other less expensive products. Start by determining your budget, then decide if you want a traditional camera or a cellular camera.
- Traditional Cameras: These cameras store photos on an SD card, which you must retrieve manually. They are ideal for areas close to home or places where you can easily sneak in and out to check the footage.
- Cellular Cameras: These cameras send photos directly to your cell phone via partner cellular networks, usually through a free or paid subscription plan. They’re perfect for hunting areas far from home.
Once you’ve chosen a style, consider specifications like shutter speed, motion detection, battery life, etc. I’ve found it best to test different settings out yourself – it’s usually a tradeoff between performance and battery life.
Key Locations to Place Your Cameras
If you’re scouting a specific property, consider looking into these locations:
- High Traffic Areas: Find a main deer trail and place a camera there. Simple as that. Lots of sign means lots of deer. I’ll use these to get a sense of how/when deer move and to get a better sense of the local herd in general.
- Remote Locations: Get creative and go deep. Look for a remote group of trees in a swamp or a pinch point only accessible by water. Places that are hard to access and also funnel deer into smaller areas are money. These spots can offer the best chance of capturing a big buck on camera.
- Actual Hunting Tree: While this isn’t necessarily my strategy, some hunters place trail cameras on/around the very tree where their stand is located. This gives them a real-time look at what’s passing by their stand and might even deter potential stand thieves.
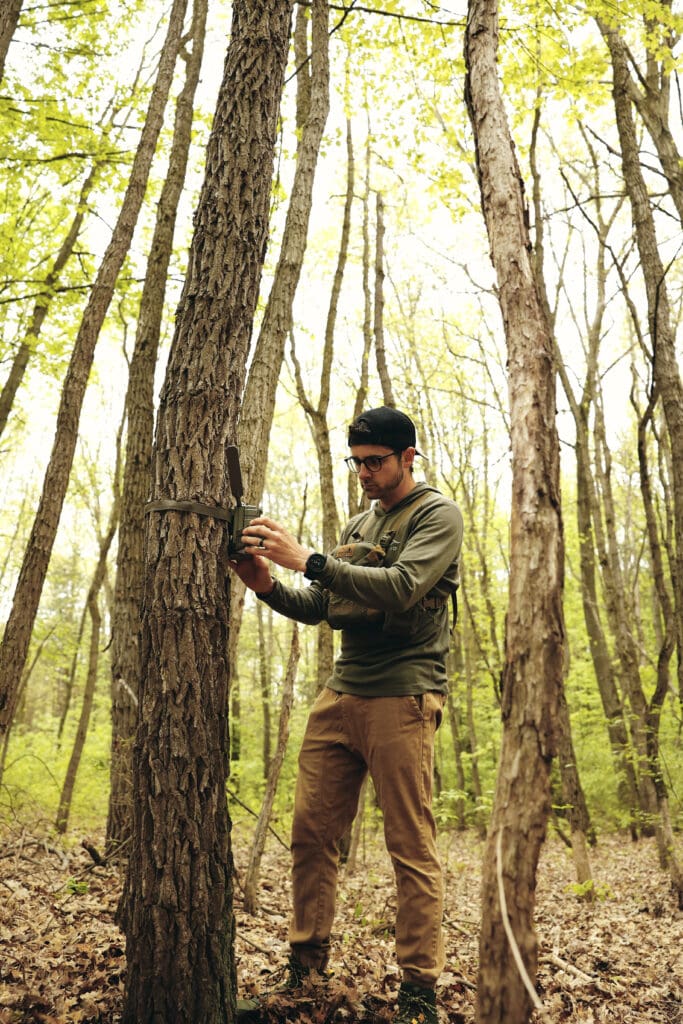
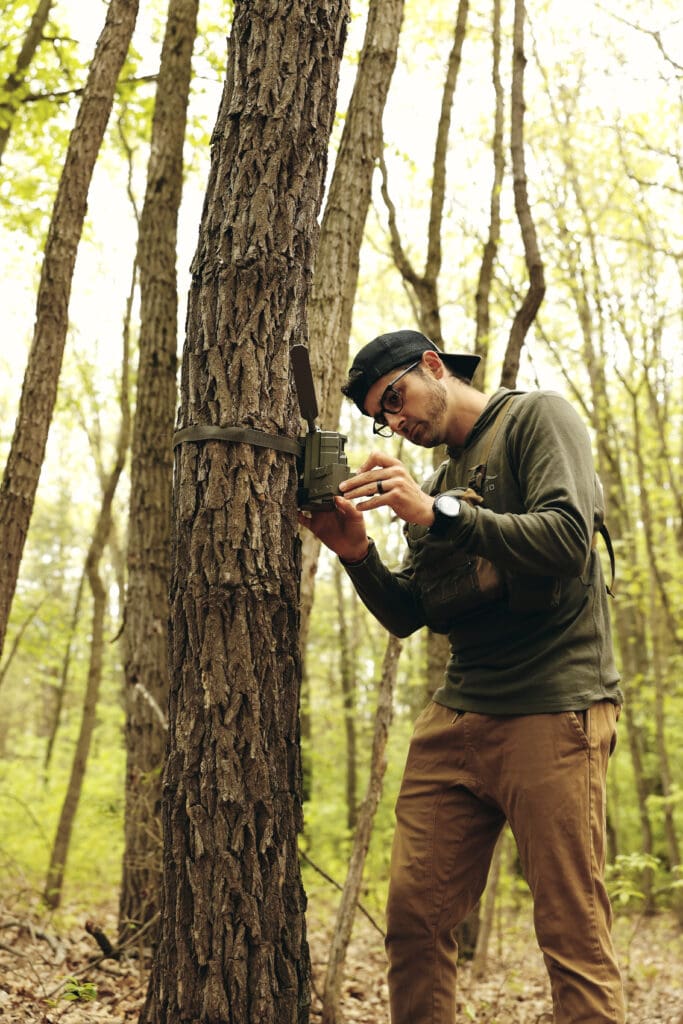
Installing Your Cameras
Now that you have a few spots in mind, here are a few tips for setting your cameras out.
- Rainy Days: I find it useful to install cameras on rainy days or just before rain. It allows you to sneak into your location quietly, and the rain helps with scent control. Rain creates ions that trap scents, much like ozone generators used by treestand hunters.
- Elevation: Hang your camera higher than usual, angled slightly downward. This provides a better field of view and helps hide it from thieves. I carry a climbing stick when hanging cameras for this reason.
- Orientation: Position the camera facing north to minimize sun glares.
How Many Cameras Should You Use?
This question often sparks debate. Some hunters swear by them, while others don’t use them at all. Some use a few, others dozens. It really depends on your situation and your style. If you’re hunting a large property, multiple cameras make sense. But 20+ cameras on 10 acres is overkill. Find a balance that works for you.
Bait Sites and Mock Scrapes
Bait sites and mock scrapes are helpful in condensing deer movement into a smaller area in front of your camera. They’ll draw deer that might pass around, directly in front of its field of view.
- Baiting: If legal in your area, using food plots and mineral licks can attract deer and improve their health. They’ll also keep deer in one spot for longer, allowing for better footage.
- Mock Scrapes: I have had great success using a mock scrape paired with a licking branch. The setup is really easy: find a tree with a low-hanging branch (like 4 feet off the ground), along a deer trail. Find a thinner branch and snap it slightly so it hangs down but doesn’t break off. This is where deer will rub the scent glands on their face, communicating with other deer that pass through. Underneath, scrape away the leaves and churn up the dirt with your boot in an oval shape. I’ll typically put some sort of scent on both the branch and the scrape – I’ll either spray deer pee or my own.
A Couple Final Tips
- Cleaning: Don’t forget to clean your equipment. It gets dirtier than you think, which does impact performance. Start with the inside of the camera. Clean out dirt, debris, and corrosion, then move to the outside. Follow the manufacturer’s cleaning instructions carefully.
- Organizing Photos: Don’t let your photos get scattered across your hard drive. Name your cameras and set geo-locations to keep your gallery organized. In the offseason, save the ones you want in named folders. It’s easy to lose track of this stuff.
- Checking Batteries: Don’t forget to replace the batteries (lithium are best) and clear the SD card before setting out your camera. Mark your cameras for “readiness” with colored tape over the latch, so you know they’re good to go.
- Don’t Rely on Trail Cams: Trail cams are amazing scouting tools but they’re only part of the puzzle. Simply throwing one out without spending time in the woods won’t equate to consistent success. You can only get a good picture of the woods you’re hunting by spending time in it.
- Have Fun: Hunting is meant to be fun and trail cams can greatly enhance that fun. I love seeing big bucks on my cameras but I also love seeing bobcats, bears, coyotes, and whatever else passes by. It’s fun seeing what animals are doing when no one is around. Use them to enhance the experience – they shouldn’t be a source of stress, marital strain, or jealousy. Enjoy!